2 min read
Employer Guide: Getting started with heyclock
Estimated time: 5 minutes Guide takes about 5 minutes
Welcome to heyclock! We are so excited that you will be joining us! Let’s get started.
-
Register and login
-
Create a work schedule
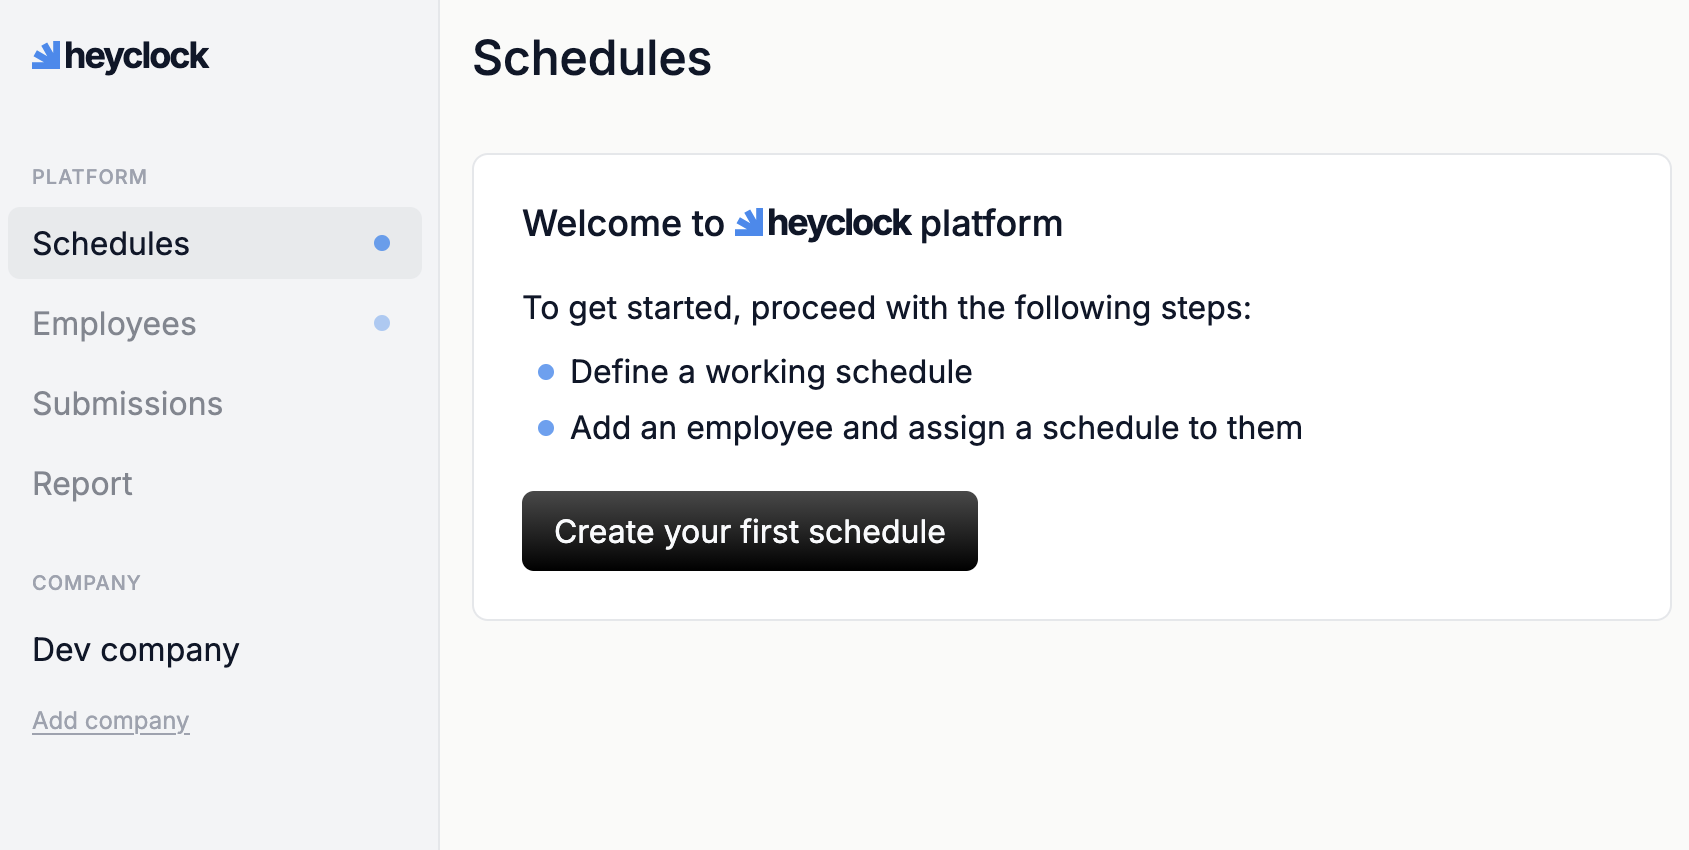
Work schedule will define set times when your employees start, finish work and have lunch breaks. These values are used for automatic populating of timesheet fields. Employees can always change these values depending on how they worked that day.
You can create multiple work schedules to fit various contractual agreements that you have with your employees. You can also just use predefined schedules we have prepared for you.

-
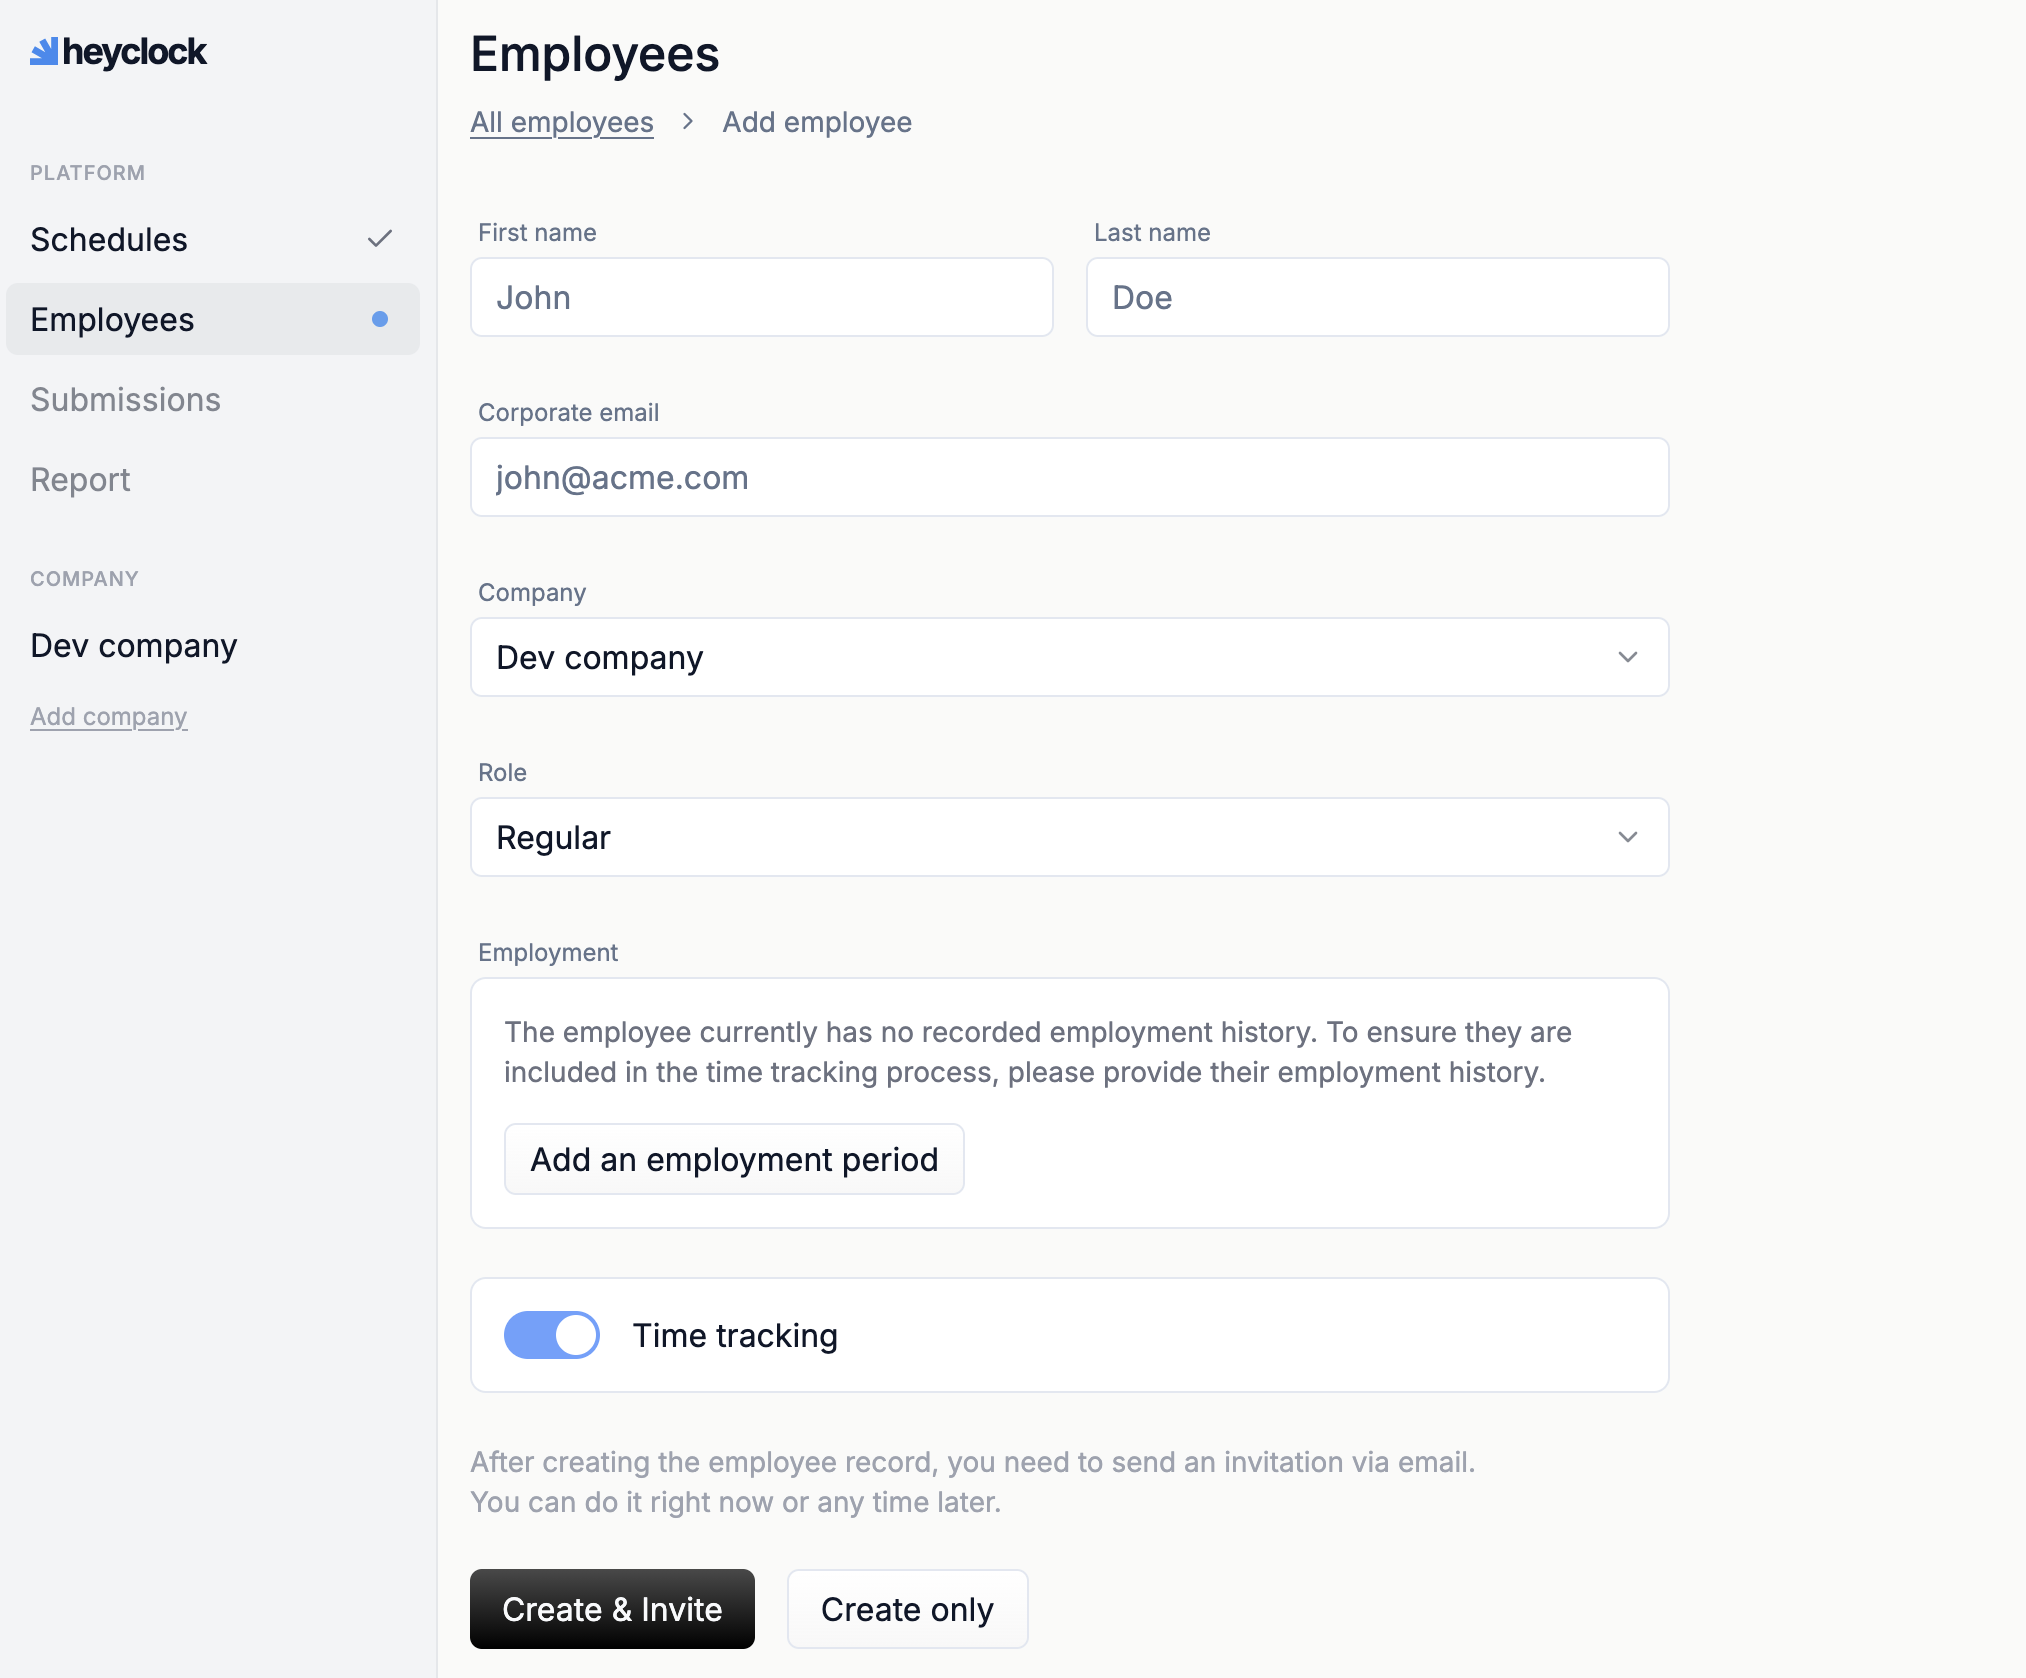
Add your employees
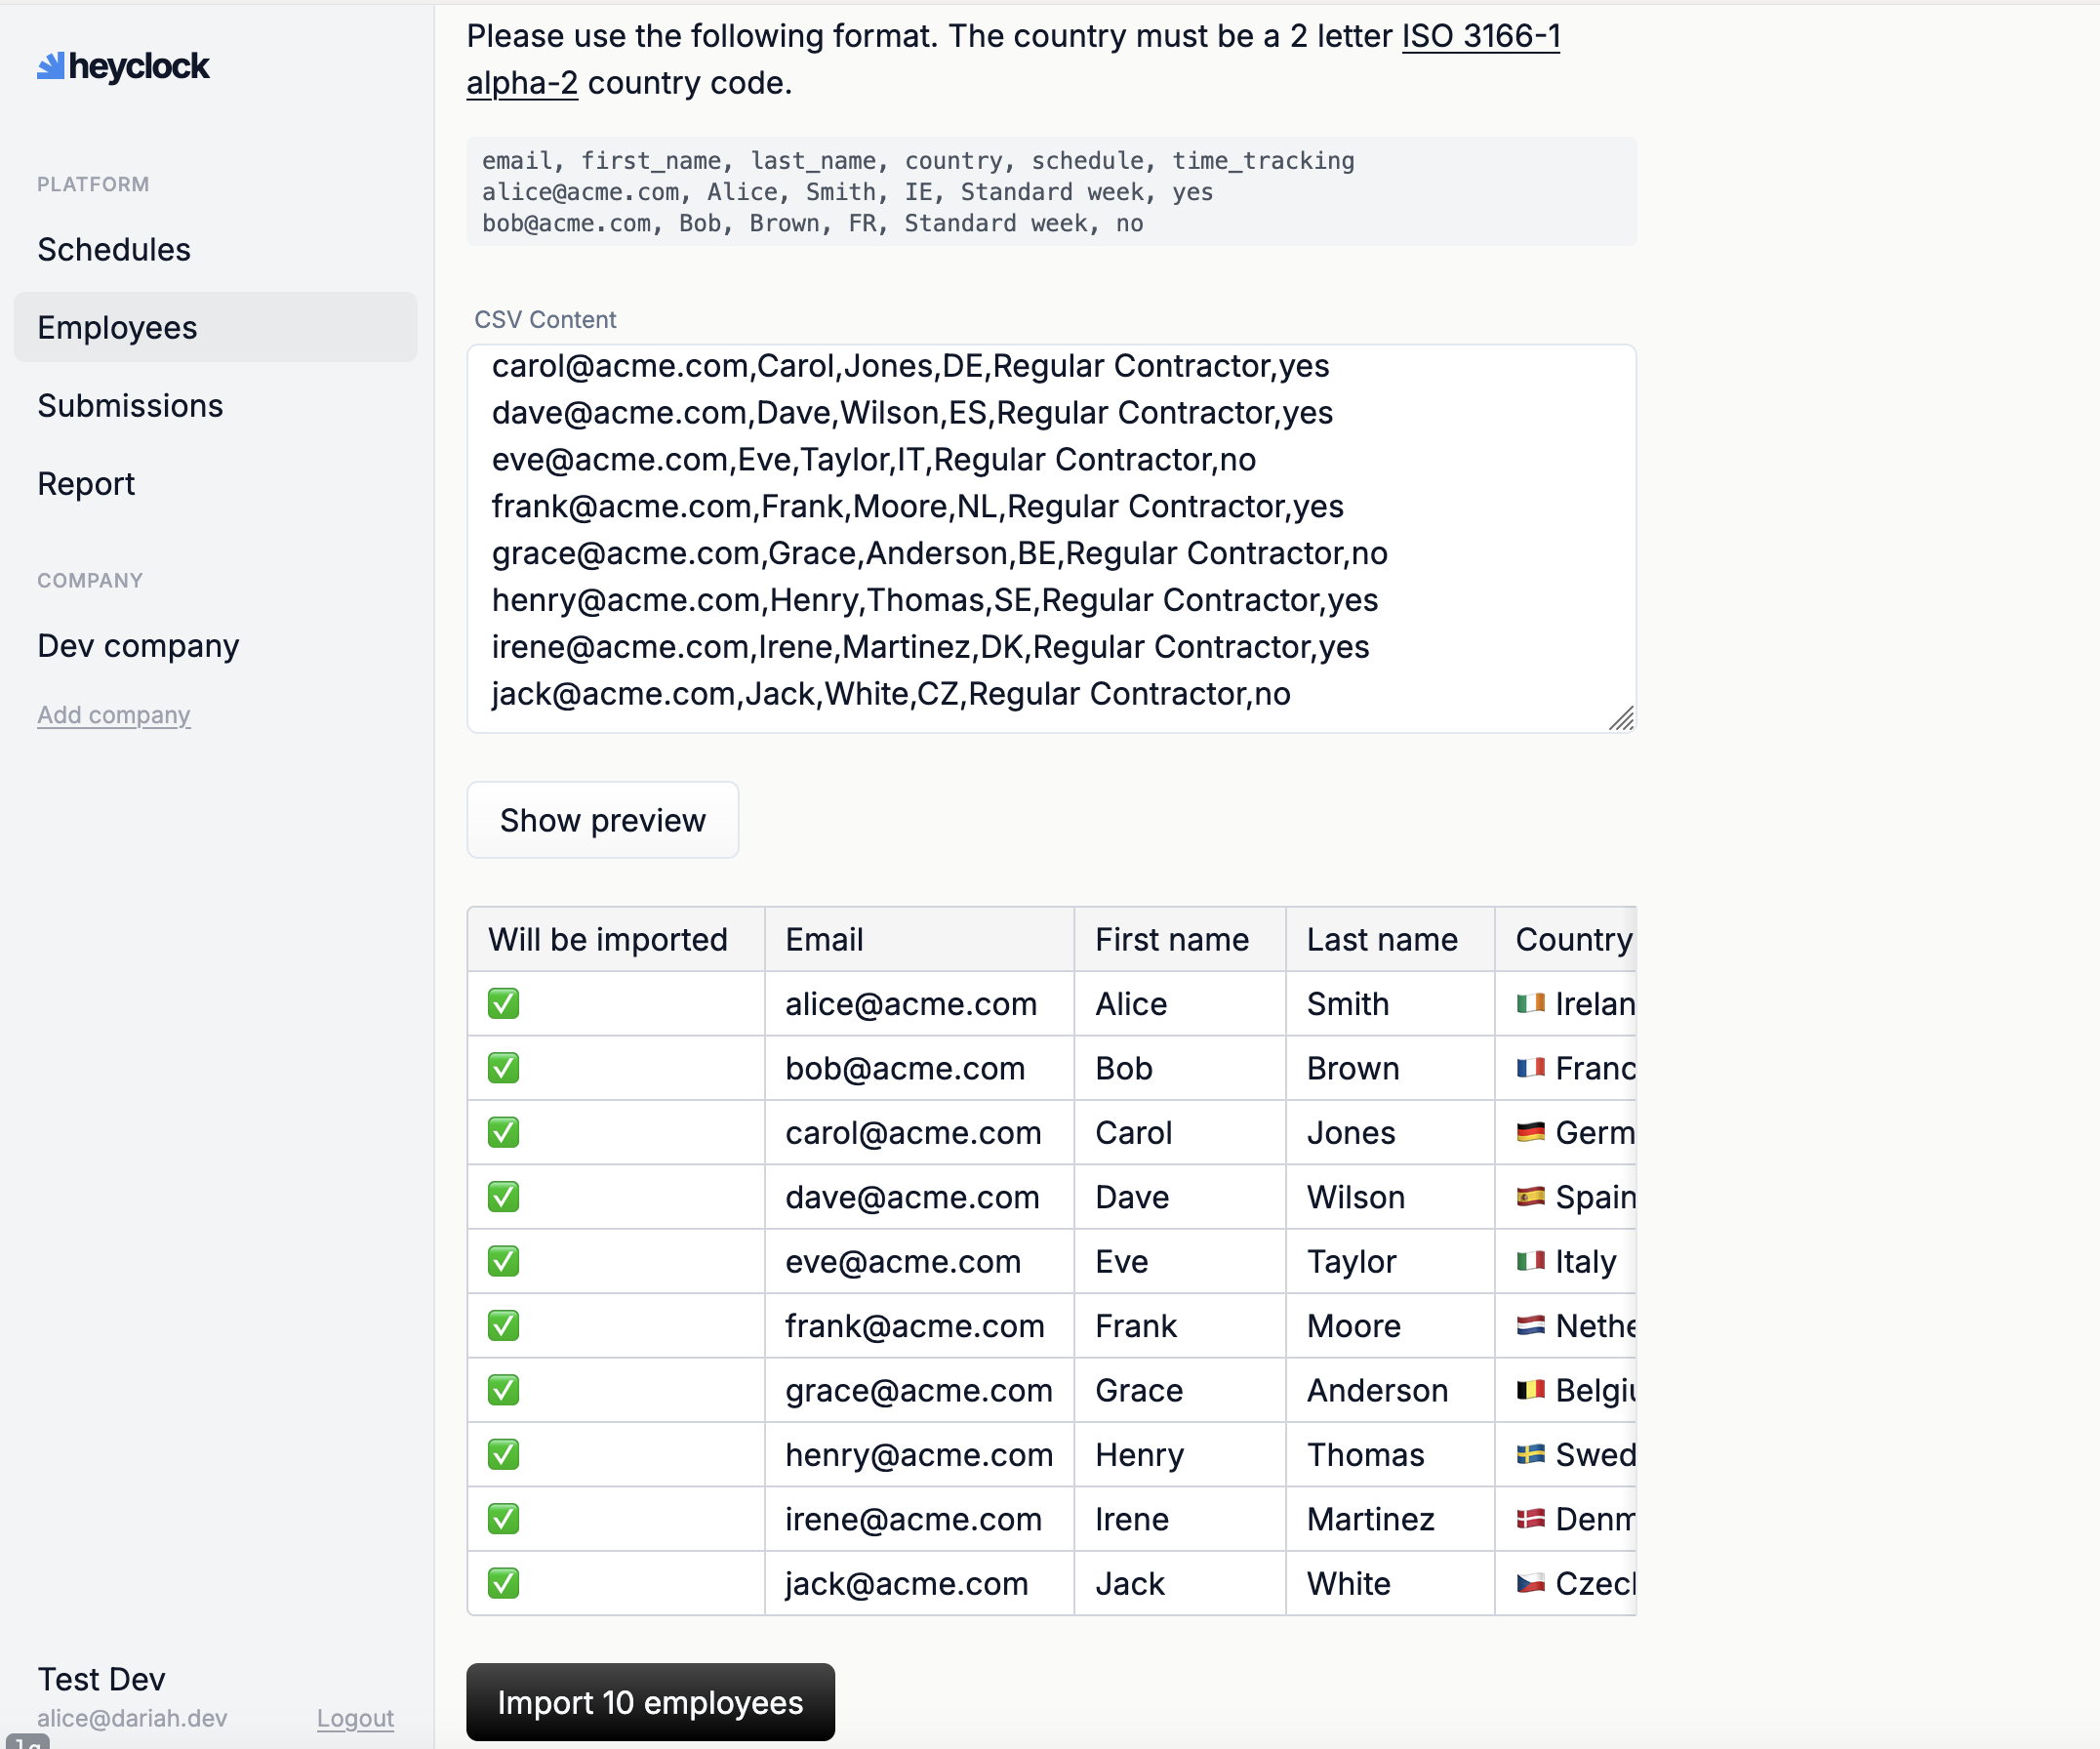
Let’s try to add one manually. Go to Employees menu and click Add Employee to get started. (If you have a lot of employees, do not worry we have CSV bulk imports.)
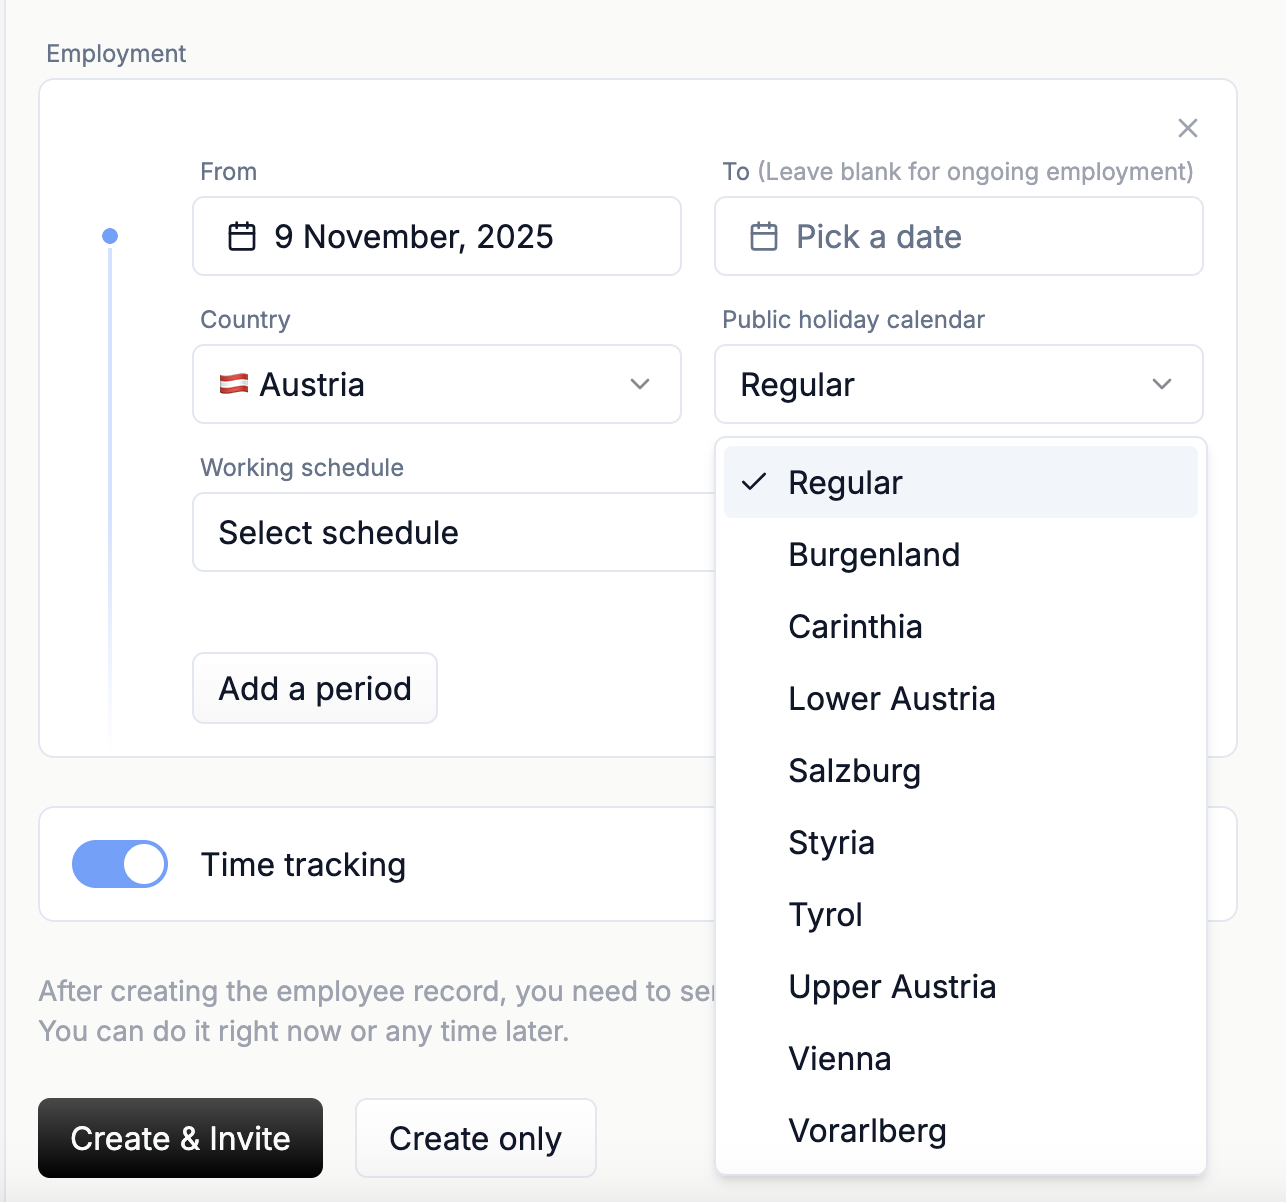
Define employment period, which is the start and end of your contractual agreement with them. Then, pick working schedule for this employee and set their holiday calendar.
You can invite the employee to login to heyclock immediately, or simply create them and leave sending out invite for later. When an employee receives an invite they get access to their part of the system, where they can log their hours.
-
Import the rest of your employees using CSV bulk import
That is it!
Simplify compliance today
Start your free 60 days trial now and make time tracking compliance effortless.